Quick Start
This is the fastest way to get one restaurant usable for a real team.
Before you begin
- You need a management role: Owner, Admin, Operating Partner, or Manager.
- If you have access to more than one restaurant, switch to the right one first.
Step 1: Open the checklist
You can reach the setup flow from either place:
- Open Home and use the Get Started checklist.
- Or open Tools > Get Started.
- On mobile, open More > Manager Tools > Get Started.
Step 2: Confirm restaurant details
- Open Restaurant Settings.
- Verify the restaurant name, display details, and any location-specific settings.
- Add branding in Branding so the app looks right for staff.
Step 3: Add menu items
- Open Tools > Menu Editor.
- Add enough food, cocktail, wine, or other categories for staff to start browsing.
- Use Mark as 86'd for unavailable items.
- If you want an item on Home, turn on the off-menu feature highlight for it.
Step 4: Build the first SOP
- Open Library.
- Click New SOP.
- Add a title, summary, category, and at least one module or attachment.
If the Library is empty, that is normal for a new restaurant.
Step 5: Check billing before you need Pro tools
Open Tools > Billing on the web app if you plan to use any of the following:
- Invite Staff
- Announcements
- Glossary management
- Extra restaurant slots
- Staff flashcards or self-quizzing
Starter is enough for basic setup. Pro matters once you want the full training workflow.
Step 6: Invite staff when the plan is ready
- Open Tools > Invite Staff.
- Enter the teammate's email.
- Choose their role and restaurant access.
- Send the invite.
If the page is locked, your restaurant still needs Pro access.
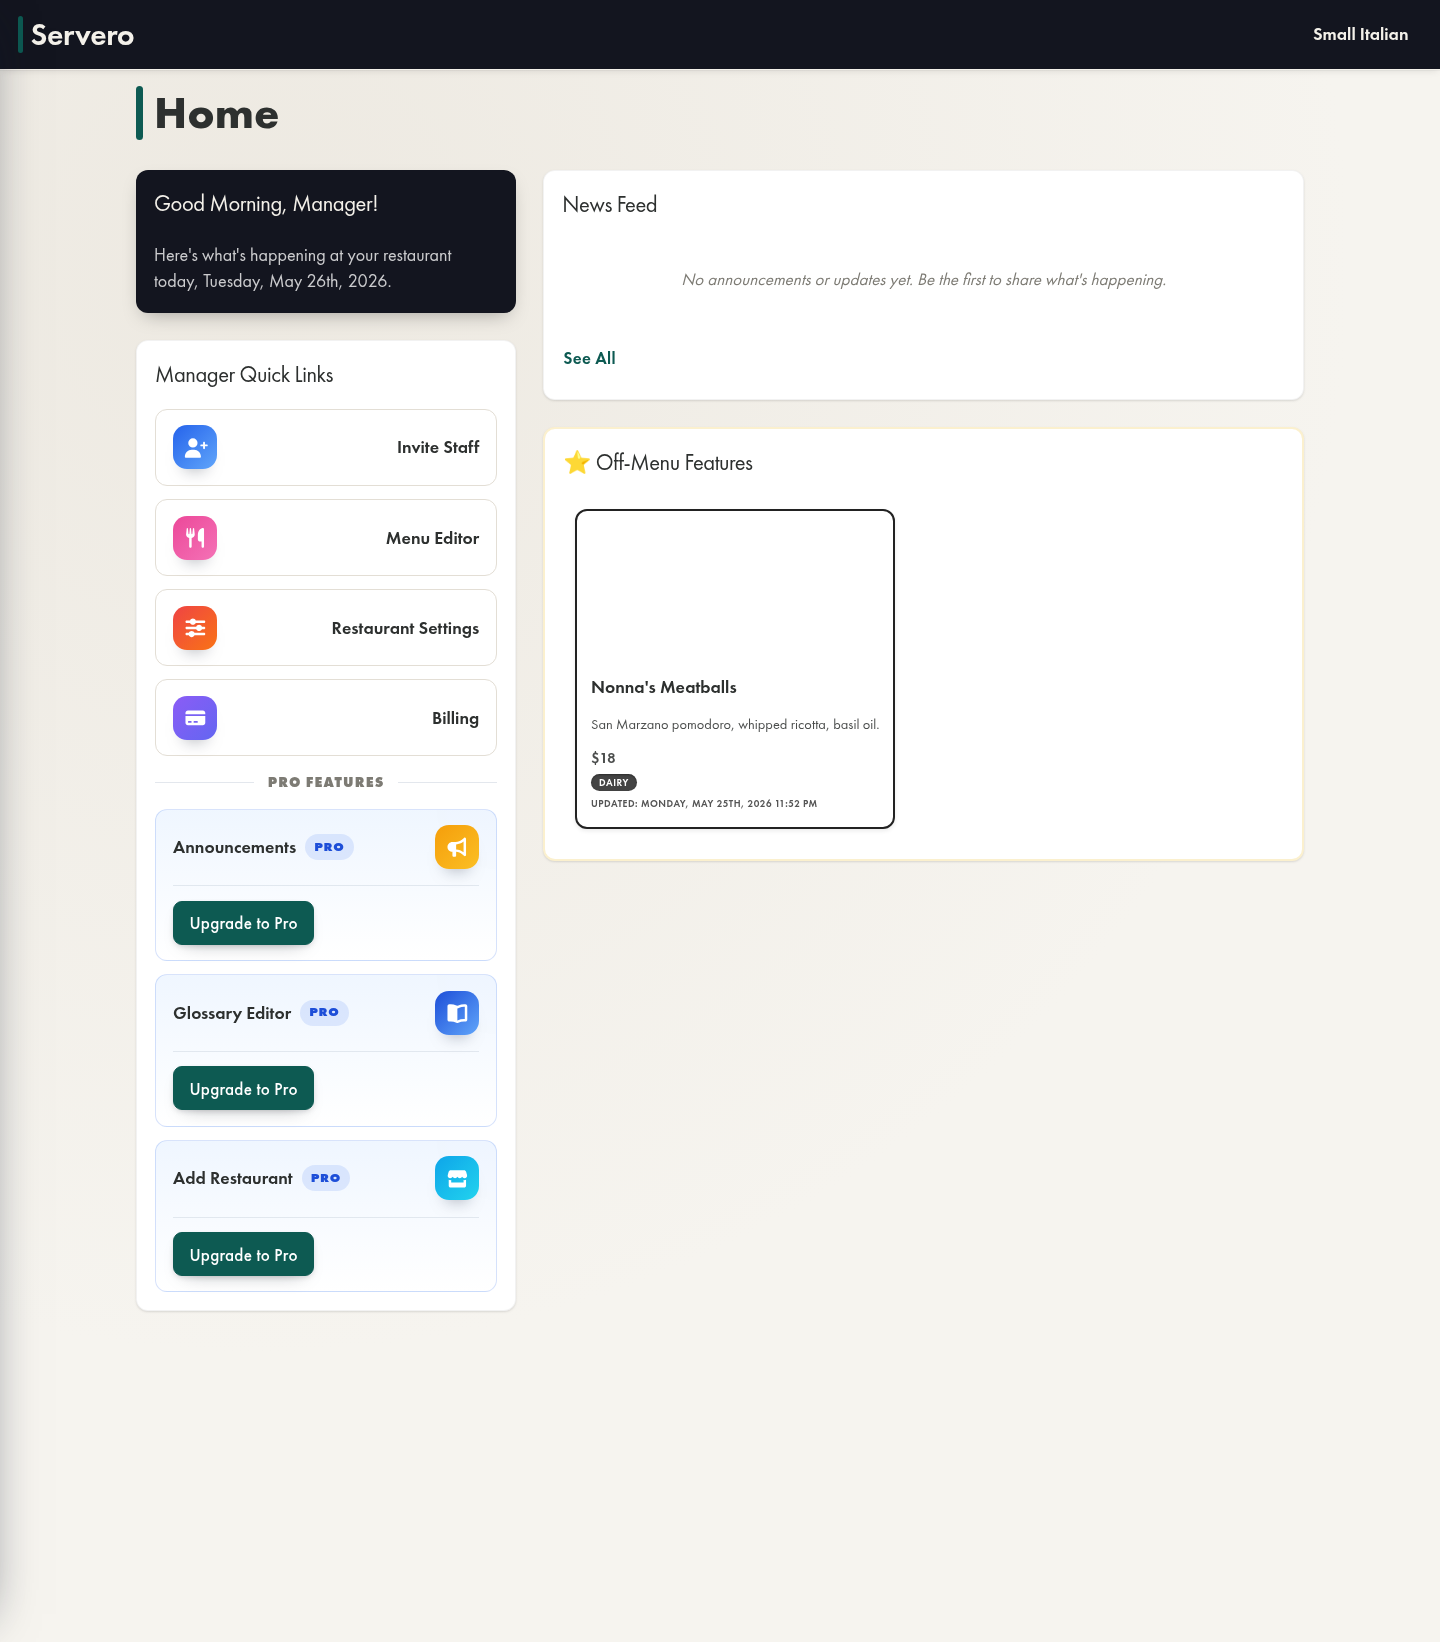
Step 7: Use Home as the final check
Before you hand the app to the team, confirm that Home looks healthy:
- The checklist is mostly complete.
- Manager Quick Links point to the tools you expect.
- News Feed is ready for announcements and update activity.
- Off-menu features only show the items you want highlighted.
If something looks wrong
- Make sure the correct restaurant is selected.
- Recheck Roles and permissions.
- Review Billing overview if a tool is locked.